Follow "Wood for Food" Blog by Email

Want to stay posted? If you'd like to receive an email when a new post is added to the Wood for Food blog, just type your address in the above field, and click "Submit."

Saturday, February 28, 2015

Cold frame fun

At long last... a standard cold frame! I've always wanted to build one. 


My first traditional cold frame started off with some very thick, gorgeous (but on their way to rotting) boards from behind our shop. My dimensions were based on the size of a window my Dad gave me.


After building the base frame, I set about making the sloped sides. I'd never used triangular pieces for creating slope before, and it took a few tries with the chalk line to get it right. A chalk line is a great way to experiment visually without making any permanent errors. I found that I wanted a flat top on the triangle, to align with the rest of the frame, so I made allowance for that and just made sure the bottom of each triangle matched the length of the frame. This is a spruce plank that my husband milled.


Here is the sloped frame resting on the base frame... ready to tackle fitting the window.


Perhaps the most important concept I've found when building a sloped cold frame is that a solid roof on the North portion will not block sunlight. This may seem contrary to what you'd imagine. However, I've tested it out with the underground cold frame and it's definitely true, particularly during the months when the sun is lower in the sky (which is when you most need the cold frame). Most of your sunlight will be at the north end. This means you should really consider expanding your well-lit real estate inside the cold frame by making the frame longer than the window.


If you look closely here you'll see that the solid portion of the top is not blocking any light. Only the front and sides are.


I am super lucky that my Dad fitted this window with hinges before giving it to me. What a lovely surprise! Thanks, Dad!


Here is the cold frame in its new garden home, on top of the Horizontal Spruce Central bed. Hopefully this structure can capture some of the heat that is probably rising from the decomposing hugelkultur below. 


I added a pivoting arm to hold the lid open as needed. It consists of an edge from slab wood held to the base frame with a nail that is pounded only partway in. 

I'm really happy with how this cold frame turned out. Although there are still some clods of frozen soil, this bed was covered and had thawed out enough to plant! February 28th and I planted carrots, onions, and radishes. I had forgotten the radish seeds earlier, so I walked down to the garden after dinner and planted them in the moonlight, with Venus and Mars above me to the west. We'll see what happens next inside this frame... The weather has been unseasonably mild, so I might as well take advantage of it. This cold frame helps me do just that. Plus, it will keep marmots out, once they wake up!

I'm feeling ready for spring.

Sunday, February 8, 2015

Despite Snow and Ice

On this long-awaited sunny Sunday morning, I headed straight for the garden. I was expecting muck, wet snow, and ice -- but what the garden had to offer exceeded all expectations.

Look who doesn't mind a little snow and ice!

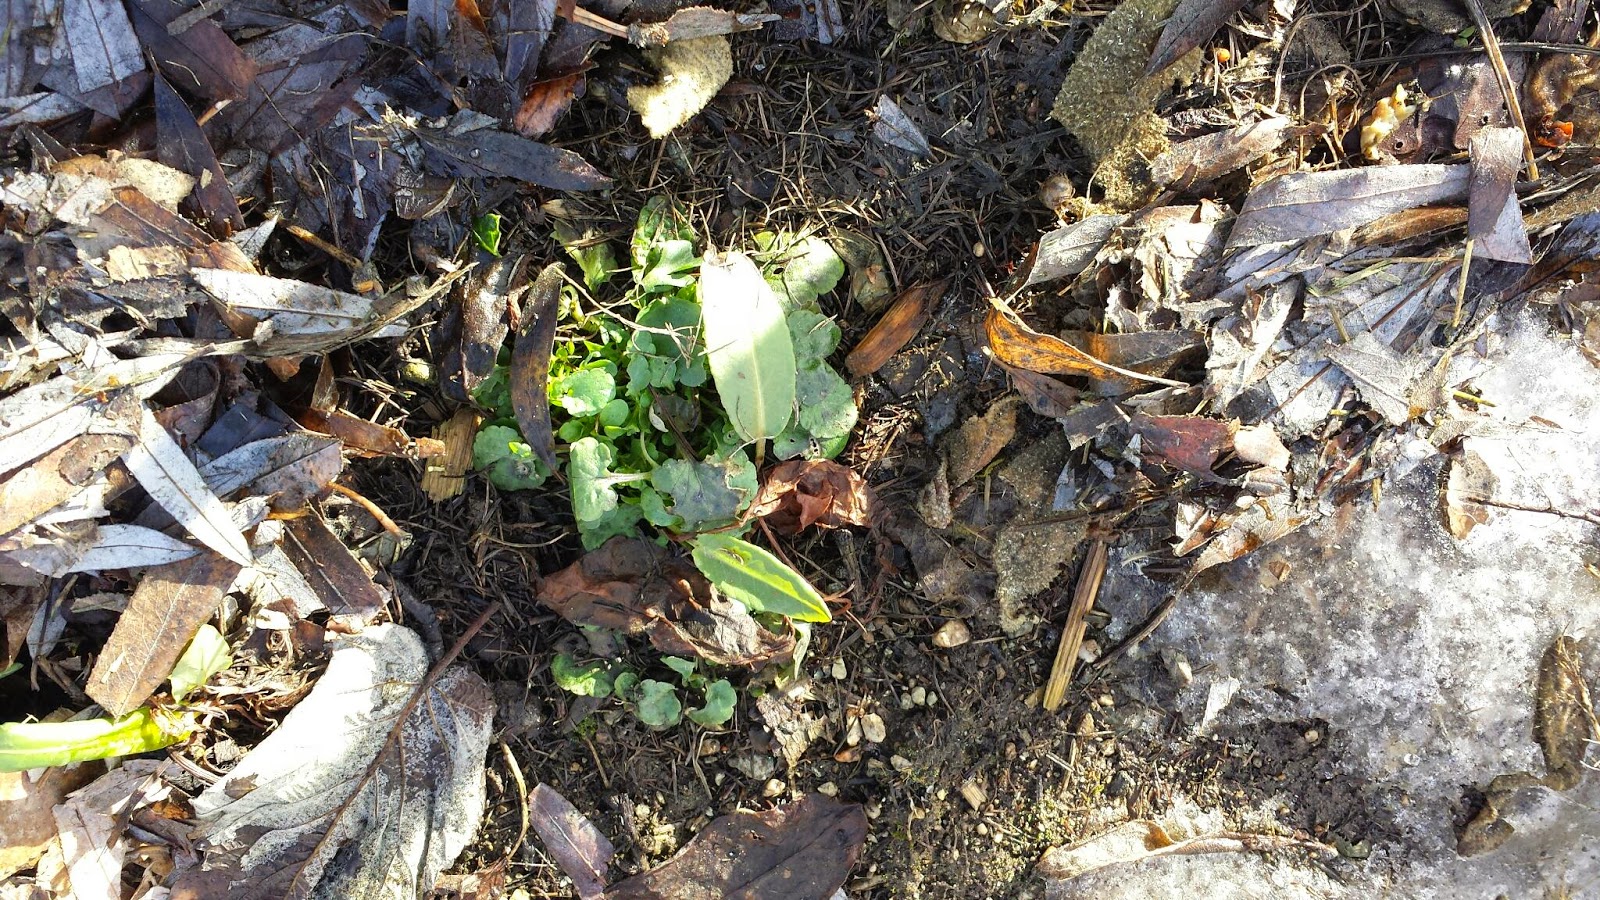
I am pretty sure the shoot emerging straight from the ice is French sorrel, which will undoubtedly be one of the first salad greens from the garden this year. It is growing in the center of the Aspen Hotbed, the warmest seat in the house. I can't think of what factors other than warm toes would cause sorrel to rise out of the ice like this. Yeah, hugelkultur -- I think it's working! 

One of the more hotly debated potential benefits of hugelkultur seems to be the idea of a longer growing season due to heat generated by decomposing wood. This Aspen Hotbed has lots of large diameter aspen in it, but also contains a massive load of horse manure to keep things warm. Apparently manure was used successfully to heat veggie beds in France hundreds of years ago, when the streets were filled with horse-drawn carriages generating more manure than people knew what to do with. The combination of large wood and manure in my Aspen Hotbed seems to be an effective strategy for our climate.


More sorrel as well as Johnny jump-ups.  


I discovered some mystery shoots in the first Aspen Bed, which has plenty of aspen buried beneath the ground, but only a modest amount of manure.


I'm hoping this might be celery, which I planted at the end of last summer. It didn't germinate then, but perhaps it is germinating now!

More potential celery... (?)

The strawberries don't mind a little snow at all!

The grape hyacinths are greening up under their bed of willow leaves.


These raspberries are growing in the Alderwood Bed, and again it seems that having warm feet must be making a difference. If your raspberries are sending out green leaves despite having snow on the ground, please let me know in the comments below! I'm curious about how common or unusual this might be.


Either beets or rainbow Swiss chard has overwintered! I think these are beets but I'm not 100% sure. Time will tell. Either way, I see sautéed greens in my future.


Of course the catnip is always one of the first plants to green up...

...but how about marjoram? This one is growing in the Blueberry Spruce Bed.

This Swiss chard sits near the top of my Sunday morning miracles list. It overwintered in a bed that is caged around the perimeter with hardware cloth fencing, lined with a combination of fabric, grass mats, and clear plastic. However, there is no roof on the cage, so I did not expect anything to overwinter. We had some very cold snaps in early winter, too! Maybe it doesn't take as much protection as I had thought...

My garden fabric hoophouse collapsed under the snow, but lo and behold, there seems to be green showing through the reemay! I couldn't check underneath to see if it really is alive, because the garden fabric is thoroughly frozen to the ground on all sides, under snow and ice. I'll just have to wait for things to thaw. If I'm lucky, it will be rainbow Swiss chard from last summer!


What a feast for the eyes... lush green against white snow. I realize that we would have a better summer if we'd had a better winter, and that we need our snowpack to feed our streams more gradually, and that spring in February in North Central WA could spell bad news in a variety of ways. That being said, I am going to make the most of it, and soak up the magic of plants alive and growing in the garden! It's reason to celebrate; I can't feel any other way.

Cheers!

Saturday, January 24, 2015

Boxspring for Springtime ~ Part 1

When a friend offered my daughter a bed with drawers in the base, we ended up with an extra boxspring mattress. The cloth covering happened to have a tear in it, so I peeked inside. "Looks like an excellent cold frame to me," I thought...

I cut and pulled the fabric off...

...and was surprised to find the flat surface to be nothing more than cardboard. 
Hey, a matching piece of cardboard -- I can sheet mulch with it to keep weeds from growing in the cold frame -- bonus!

Here's how it looked with the fabric cover removed.

I slid it down the driveway today like a sled, and it was a piece of cake. 
Perfect conditions for boxspring relocation! 
The sun even came out briefly for the occasion.

I just happen to have a garden bed that is exactly the same dimensions as a twin bed, with drip irrigation already in place. Serendipity! I had to dig around a bit under the snow to find the boundaries of the bed, where the pine needle growing mulch meets the wood chip walking path.

Here is the naked boxspring in its new home, starting its new life. 
Next comes the makeover, which will involve: 

   - Building a slab-wood base frame
     (to keep the boxspring from rotting so quickly, 
     and to create more vertical growing space)
   - Creating two hinged panels for the roof, 
     with either growing fabric or plastic on frames
   - Adding triangular side pieces for the roof panels to rest on
   - Stapling plastic along the sides
   - Driving rebar into the ground at each corner and securing the frame
      so that it doesn't end up in a tree like last year's mini-greenhouse did...

I'll post again once I've made progress on those steps. This mid-winter project gave me the feeling of gardening again, which was a real pick-me-up on a foggy, snowy day.

Let me know if you have any mid-winter gardening projects going that help bridge the gap between frozen ground and lush green garden beds!

Sunday, January 18, 2015

Eat Like a Rainbow

How do you "eat like a rainbow" in snow country... in January?
I do purchase veggies at the grocery store and co-op, but I'm always striving for a greater percentage of our vegetables to come from home. Homegrown pretty much always tastes best, is most nutritious, most fresh, and feels just right too.

Enter Radishes
Radishes alone can provide a broader spectrum of colors than you might think. In September, radishes are so plentiful in our garden that it's hard to know what to do with them all. It turns out that simply putting them in a ziploc bag in the crisper drawer of the fridge is all it takes to enjoy them when each radish seems utterly precious -- in January! Maybe next year I will try storing some in the ground with a thick layer of leaves on top, in the traditional method for winter harvest of carrots.

If my garlic cloves are getting soft, I like to pop them into a pot of soil somewhere in the house. The greens are scrumptious and you can actually plant several in one pot if you're growing them mainly for the greens and stems. Fresh green seems to be the one color in the rainbow that I miss most on my dinner plate this time of year, and garlic is a no-fuss way to keep home grown fresh green on the menu all year long! Minced garlic greens are delicious over baked potato, and in salads, soups, sandwiches... you name it.

Parsley also seems to do fairly well indoors, though it's a little more prone to insects and disease than garlic. So far so good this year. Parsley is packed with Vitamins A, C, K and folate, and also has calcium, iron, magnesium, potassium, copper and manganese... its nutritional profile will blow you away.

Green onions will grow happily indoors with limited sunlight. These are torpedo red onions started from seed a couple years ago, and they just keep chugging. I put them on the deck in summer and bring them in before it freezes.  It doesn't matter if they go to seed since I'm keeping them going for the greens (which also provide Vitamins A, C and K). 

And how about that cabbage base I pulled out of the fridge and planted in a pot indoors toward the end of last winter? It's still going too! The greens are great in both soup and salad, or any way you enjoy cabbage.

You don't need a formed head to make use of cabbage! 
And the taste was not affected by it going to seed.

Okay, we've got green covered, but what about the rest of the rainbow? 
Well, there's pink rhubarb from the freezer...

 
...and few things are more cheerful than red peppers growing in your house in the winter. On the left is a lipstick sweet pepper from a plant that has been growing in our house for a few years now. The leaves get a bit sickly looking each winter, but I prune the plant annually and it always makes a great comeback in the spring. I think I will pick this pepper and eat it tonight in our salad! On the right is a tiny, very hot pepper from a plant I am babysitting while the owner, my neighbor, is away. I've had it for a year and it's been interesting to watch. These mini-peppers are my kind of Christmas lights!

Today I pulled out the last remnants of my partially formed red cabbage from last summer's garden. For some reason, it just wasn't a great cabbage year, but fresh purple was still a sight for sore eyes this morning after a snowstorm. I'm including this photo as a reminder for myself during the height of harvest season, about just how wonderful every home grown fresh morsel seems in the winter time.

Of course, another way to have a fresh veggie rainbow at home this time of year is in the underground cold frame. The great news is that none of the plants froze, even during our cold snaps of -5 F or -21 C. The bad news is that it looks like a war zone in there -- and in a swiss chard against rodents fight, you can guess who is winning. I also see slug sign, so I guess my slug trap needs some fresh beer. Silly me for thinking the slugs might just hibernate!

These cold frame photos were also taken today. Yes, it looks pretty sad... but actually for my first winter with this experiment, I'm just excited to have live plants that did not freeze. The only heat sources are the manure piled deep beneath this bed, and the low winter sun. The brown mulch consists of plants I chopped out of the garden in fall. The green parts are the remnants of my swiss chard and other hardy species that survived the cold but have been ravaged by the wildlife. Now that temperature isn't an issue, I'll have to work on rodent proofing with another large cage I guess. I don't call it "Vegetable Jail" for nothing. Whatever works!

Note: The name of this post comes from one of my daughter's favorite songs, by Jay Mankita (Putumayo), "Eat Like a Rainbow."

What is your favorite way to eat like a rainbow in the winter?

Wednesday, December 10, 2014

The Greens Keeper Season Extender

When your cold frame is frozen shut with ice, 
it may feel like season extension has come to a close.

Enter: the "greens keeper" in your fridge.

I do not know why these work so well -- or why they cost so much. However, I do know they are worth every penny. (No, I do not sell Tupperware... I just grow fond of things that work really well in my kitchen.)

Traditionally, the lettuce keepers were shaped to fit a head of iceberg lettuce. As all foraging gardeners know, this shape does not necessarily match the dimensions of the goodies we bring into the kitchen.


Instead, the old style rectangular celery keepers work great, or the fancy new veggie keepers with either one or two vents to open or close, depending on what kind of food you are keeping.


In the dead of winter, the greens from my garden are as crisp as the day I picked them -- as long as I have remembered to pick them before the first deep freeze. I missed a lot of greens this year because the weather turned so cold so fast. I'm grateful for what I did harvest, though. My last harvest day was November 9th, and most of these greens were picked in the week before that, all from protected beds. A month after being picked, they are still in perfect condition (above). 


Today it occurs to me that a lettuce keeper and a cold frame have a lot more in common than you might think. Using either a cold frame outdoors or a greens keeper in the fridge, the process hinges on:
  1. Growing your plants so that they reach maturity in the fall. (Either way, having winter greens in a Northern climate is not about planting seeds in autumn... it's about planting them in July.)
  2. Protecting plants from a killing freeze.
  3. Maintaining (not really growing) fresh mature plants so that they can be eaten during winter.

♢     ♢     ♢     ♢     ♢     


My experience so far shows the following results...

Greens that last exceptionally long in a veggie keeper:

✯   Kale   ✯   Swiss Chard   ✯   Many lettuce varieties  ✯  Dark purple beet greens

Greens that keep reasonably long:

✯ Green Orach
Regular Beet greens
✯ Love Lies Bleeding Amaranth leaves
✯ Chives
 ✯ Carrot greens
 Some lettuce varieties


Greens that must be kept separate because they are the first to go:

✯ French sorrel


Of course you can use these keepers for other veggies such as carrots and celery, but I find those do fine in the crisper drawer of the fridge. For the valuable real estate inside my keepers, I prioritize greens.


♢     ♢     ♢     ♢     ♢     


Food for Thought:

As exciting as it is to have food alive and growing in December 
even after a hardcore freeze 
-- and yes, this means a lot to me --

For the volume of greens I am keeping alive in my cold frame this winter and for the amount of work that went into this project...

A greens keeper can actually hold quite a lot
(And I have several -- mostly second-hand purchases, a couple bought new)

I'm willing to acknowledge the square footage and work vs. yield ratio, but I'm not giving up the underground cold frame for anything. It's too much fun having live plants outdoors during winter! There is no plastic needed for cold frames, they don't take up space in your fridge, and they require no electricity. I'm also learning that you can transplant a higher number of plants into the cold frame in autumn: each plant does not need a lot of space as they are not doing much growing during winter. This practice would increase the yield. 

Plus in the spring, the cold frame will begin to produce 
before anything else even gets started. I can't wait...